|
|
|
Raw Edge Appliqué on the Longarm Machineby : Elizabeth Williams
Most of us are familiar with the basic raw edge appliqué technique. The rough cut exposed edges of the appliqué designs have a primitive "folk art" style, and were exactly the look that I required for my most recent art quilt project, "Dancing With My Mother". (You can find high resolution close-ups of the quilt on http://community.webshots.com/user/bizzyquilter) Since this quilt is rather large for an art quilt, 6x8, I knew that the only practical way of completing a project of this size and complexity was by utilizing my longarm machine. With the options afforded me by my I/S-2K Stitch Regulator, I felt confident that I could complete my design to my satisfaction by using only my longarm machine. With a rough sketch, some batiks, and a big bunch of my newly hand dyed fabrics, I just dove right into the process, and for me, it was a sort of "learn as you go" kind of thing. Below, is a step by step description of how I completed the project. None of the techniques are new, nor are they very difficult, but when adapted to the longarm, with I/S-2K, the time required to complete this project was reduced by more than half. Step 1 - Design and Layout The original layout sketch was done in 81/2" x 11" format. I drew the figures separately, and fitted them into the layout. You will notice that the finished piece is different than the layout sketch in some respects. I used the layout sketch as a guide, but still made many decisions as the project progressed. 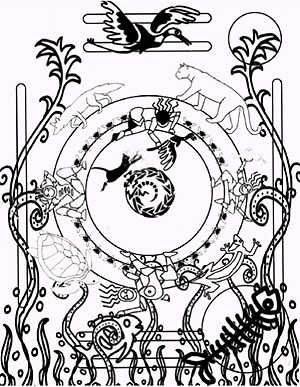 After I was satisfied with the layout and basic figure placement, I scanned the sketch and printed it out as a black and white transparency. Utilizing an overhead projector, I projected the sketch onto a large wall. Once satisfied with the size, I made "perimeter marks" on the wall with masking tape. That way, if I had to move the projector, I could set it back up to exactly the same size by matching the transparency edges with the existing the tape marks. My background fabric, which was cut 4" larger than the anticipated finished piece, was taped to a large, flat, horizontal surface. I then made a chalk outline to the finished size, and also chalked in vertical, horizontal and diagonal registration marks to help with the placement of the figures and design elements. Step 2 - Figure Transfer Meanwhile, back at the overhead projector, I took the transparency and flipped it over, so that the side that was the top was touching the glass. This flipping projects the image in mirror image. Then I chose a figure, cut a piece of paper backed fusible web to a size that would accommodate the figures pieces and taped it to the wall with the web touching the wall and the paper facing me. Then I traced around each chosen piece. Frequently, I would move the transparency around to fit as many pieces as possible onto the fusible web. As long as you do not move the projector, all pieces will be the correct size. You can trace as many designs as will fit onto the paper.  After the designs were traced, I pressed the fusible web to the wrong side of the appropriate fabric. After cooling, I cut out each element, removed the paper, and placed it in the correct position, using my sketch and registration marks as guides. Due to the mirror image tracing, the finished element now has the correct orientation when you flip it over to the right side of the fabric. Starting with the largest elements first, I used this technique to create all the separate pieces that make up the piece. As I added pieces, I would layer them and weave them in and around each other to create movement and depth. I pressed nothing at this point, thereby giving myself the opportunity to make changes and add elements. When all of the pieces were in place and properly aligned, I checked the piece very carefully before pressing. I also made a few changes at this point, so do not press until you are sure everything is exactly where you want it! Step 3 - Pressing Once everything was in place I gave the piece a preliminary pressing by just placing the iron, heated to the appropriate temperature, on each area of the entire piece for just a few seconds. This set the piece and prepared it for the final pressing. I then took a 12" square of muslin and used it as a steam pressing cloth by placing it on the piece, spritzing the muslin with water until it was wet, and then pressing it until it was dry. This is a good safeguard. If you dont scorch the muslin, you wont scorch the piece. The wet pressing cloth creates a great deal of steam and really sets the pieces. I repeated this process over the entire piece. Remember, pressing is up and down, do not slide the iron back and forth as this will distort the piece. Ask me how I know! Step 4 - Loading  After the piece cooled, I removed the tape that held it in place and checked it for square. I then loaded it onto my longarm machine. I chose to float the top over dense cotton batt and plain muslin backing. I chose plain muslin backing to feature the quilting on the back of the quilt. Step 5 - Quilting I chose Rheingold Heavy Metal thread for the quilt top and 40 wt and Gold poly, also from Rheingold, for the back. I began quilting with a large to medium stipple in the background areas. With the stitch regulator on a setting of 8, it was very easy to stop when I reached a design element or figure. To outline the figures, I switched to constant speed mode with the motion detector enabled. I outlined each figure with a "rocking stitch", rocking back and forth at about 1" intervals, and advancing slowly. This allowed me to build up a thick outline around each feature. Because of the complexity of many of the shapes, the motion detector was invaluable in this process. It gave me time to stop and think when I needed to. I continued stippling and outlining, working my way from the top to the bottom of the quilt. The ease of switching between a regulated stitch and constant speed with a motion detector made the job go a lot faster, more accurately and with less stress. After the outlining and stippling were completed, I unpinned and basted the bottom of the quilt which allowed me to roll freely back and forth in order to do more detailed quilting.  The detail work was done in either the stitch regulated mode, set on 8 or 10, or in Precision Stitch with the same setting. As I have become proficient with the IntelliStitch capabilities, I have continued to alter my stitching mode to suit the task at hand. In my business, as both a quilt artist and contract quilter, it is very inportant to have as many tools as possible available to me in orded to make my work proceed. As I have read the exciting news concerning the IS/Turbo, I look forward to many new options that will surely affect the way I work. After I work with the IS/Turbo for a while, I have no doubt that I will have a bit to report about the new stitch modes that have been added to my list of quilting options. If you have any questions regarding my quilt, or how I choose my stitch mode for various applications, please contact me. With the myriad of stitching options available to us on the IntelliStitch, we all have a lot to learn, and plenty to share.
|


| © 2024 IntelliStitch :: Web Design, Web Development and Hosting by Desiant, LLC |